Winter Vanlife Essentials

When I started writing about the winter buildout considerations, I realized I had way too much for one post so here’s its companion post, a list of things that I found made my life a lot easier and more comfortable after spending last winter in the San Juans. I read a lot of vanlife essentials lists when I was starting out a year ago, and these I think are all things I haven’t seen on other lists (a weather station is something that was super useful to me but you’ll find on everyone else’s lists too). img_20191216_0926485743063206493550429.jpg

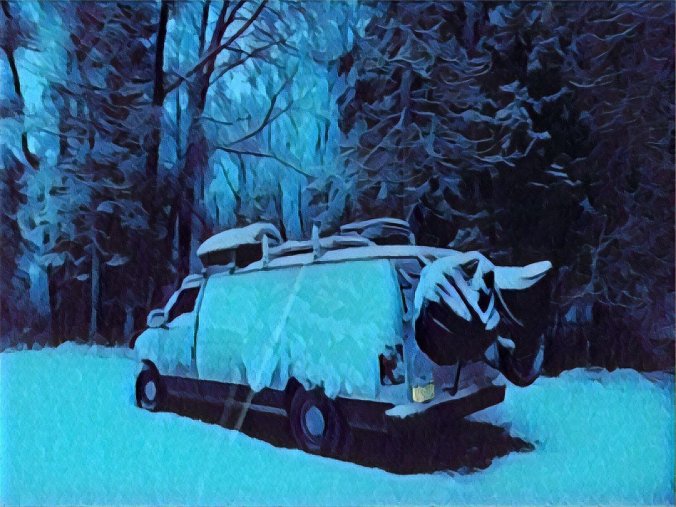
Forgot to put the cover on my bikes before an unexpected storm 😦

Down Booties I had always wanted these anyway, for winter camping (or backpacking in the mountains when it’s not even winter), or mountaineering, because my feet are always cold, but I never wanted to spend the $$$. Nowadays, you can buy cheaper versions of everything down, and while I wouldn’t recommend cheaping out on your belay parka or sleeping bag, down booties is one place where the $20 version serves the purpose fine. Of course, are the Western Mountaineering ones nicer? Duh.

The Sun Something I had never considered in the camper was the direction I was parked relative to the sun. You’re probably familiar with this concept in the summer, because your windshield is a powerful and undesirable heat source. When you’re parking somewhere for the night, if you can, face the direction the sun is going to come up.  You will honestly not believe how much heat you get from doing this and it will melt the interior ice buildup on your windshield quickly.

A Long Pivoting Snow Brush Look, I didn’t even know this existed until someone saw me trying to clean off my solar panel and brought theirs over to help. I’m short, van windshields are tall, and clearing off your solar panels is a necessary evil that’s difficult and dangerous when the van is buried in snow and you’re crawling around on the roof with a mediocre brush. There are a lot of variations of these super brushes, but the crucial qualities both for clearing the windshield faster and easier, and the ability to clear your panels while standing on the ground, are a pivoting brush and an extendable reach. It will make your life So. Much. Easier.

van at s elbert

Clip on Oil Diffusers for your heating vents I was always concerned about the van developing a smell, and winter is harder because you’re going to be keeping the van mostly shut up. When it is warm enough to drive with the windows down to get some airflow, do it. The other golden rules of keeping stink out are: keep it clean, wipe down surfaces after cooking, odor absorbers, and essential oils. At first I was just randomly dumping oils around the van, in the bedding and rug and whatnot. Then I found on these clip on dealies, you put oil on the felt pads, insert them into the little clips, and clip them to your heating vents so while you’re driving, they heat up and spread lemon or eucalyptus or cedarwood or whatever delightful scent you choose all around. They work better and are much cheaper than a standard diffuser.

Windshield Insulation Last winter I used Reflectix that I had sewn a blanket to one side of. You’re looking for the opposite effect than the summer, any reflector you want on the inside, and you want the outside to be a dark color that draws heat in. I had hoped the blanket would absorb some of the moisture that collects and freezes on the windshield, and that hasn’t worked yet. But covering the windshield and any exposed windows while you’re parked and they’re not in direct sunlight with ANYTHING will make a huge difference heat wise. I am definitely making nicer ones this year that velcro on and are more heavily insulated. This couple makes really nice ones if you have the $$ and don’t want to make them yourself. These nice folks made their own and posted here about it for some guidance if you’re going to diy, but there’s a ton of ways to do it from very cheap to very spendy. I’m going to use some of their ideas and but do it cheaper and spend less time for this winter.

Rubbing Alcohol in a Spray Bottle I don’t remember how I found this out, but rubbing alcohol melts ice. The only moisture I really had trouble with was the inside of the windshield and front windows. Whether I was just existing and breathing, or especially if I was cooking or running the heater, there would inevitably be a layer of ice in the morning. The best way to deal with this is to park in the direction of the sun and not have to drive anywhere until the sun came up and melted and dried the windshield ice itself. But I worked at the ice park last year and had to be in before sunrise. Melting ice off the windshield takes FOREVER if it’s cold and you’re just waiting for the defroster to do it, so I’d first use my ice scraper on it, then spray rubbing alcohol on it and wipe it with a towel. This is why you see towels on dashboards in the winter, ps, to collect all the melted ice water when the windshield defrosts in the morning.

Electric Blanket & Electric Gloves I was actually gifted an electric blanket for Christmas one year, I can run it off solar and it’s much more efficient to warm you up than running a heater to heat the space, and I absolutely love it. For comfort level, it is the biggest difference, and if you’re part timing or not going to be in horrifically cold temps, I would go this route first before getting a heater. I also bought these cheap gloves with heating elements in them, the heating elements are removable and you can put them in socks or boots or other gloves or anything. They only take a tiny bit of electric to run and produce a small amount of heat, but it was a big comfort level difference when I was doing computer work in the morning.

Sleep Setup I had a variety of pieces that I tried together in different combinations and what I ended up really liking was a regular comforter and a very heavy sleeping bag (flannel on the inside, heavily insulated, and some type of plastic outside, the kind you car camped with as a kid) unzipped as a top layer. I considered buying a really nice down comforter, but it would’ve been spendy and it wouldn’t have been versatile enough for summer. I also didn’t want to use my really nice and expensive UL down bag on an every day basis. In the summer, I still sleep with my medium weight comforter or nothing, and have the big heavy sleeping bag put away. This set up was warm enough to sleep comfortably in in all temperatures, the variations being that sometimes I went to bed with my down coat and booties on. I only ran the heat at night if it was below zero, preferring to sleep with Pip in our cozy little den then turn the heat on when I woke up.

Hydroflasks and Yetis I was never a hot drinks person until I started ice climbing. The same principle applies to winter vanlife. Hot bevies completely change your quality of life. I boiled a lot of water on the stove, and every time I was at a coffee shop, I’d have them fill up one of my big Hydroflasks with hot water that I could save for later. Pips and I both drank mostly warm water all winter. You can put emergen-c or tea bags in it, you can use Better Than Bouillon to make broth, lots of options. Klear bottles are identical to Hydroflasks but cheaper. Yetis do keep stuff hot for longer, it’s noticeable, but they’re so $$$ (save money and get one free at the Ice Fest).

Rugs I mentioned this in the buildout post, but just in case anyone’s on the fence (I was), you NEED RUGS if you’re going to live in your van in the winter. No matter how much insulation you have (I have 2″ of foamboard and a 1/2″ of plywood AND laminated flooring), the floor will be unbearably cold to the touch at all times. You also need rugs because you will never be able to keep up with the mess you track in with snow, and at least a rug will absorb it and dry out later.

Hope you got some good ideas from this post, how do you stay warm in the winter??

Winter Vanlife: Buildout & Heat

Tis the season for making winter preparations, for those of us choosing to live alternatively (ooh good euphemism). I woke up to snow on the mountains this morning!! One year ago, after two years in the camper, I sold it and bought a van, and I did my buildout (with an extreme amount of help from my dad) last September with the intention of spending the winter mobile in the mountains and after a year in Sisu the Skimobile at high altitude, here’s part one: insulation, heat, and other winter buildout considerations.

early winter ’19/’20

Insulation

I did the buildout with winter in the mountains CLEARLY in mind. There’s 2″ of foam board insulation on the floor and ceiling, foam board in the windows, there’s spray foam and fiberglass insulation stuffed into every nook and cranny and hole in the frame, there’s a layer of Kilmat (I got that for free, it’s sound deadener that’s already sticky on the back, awesome) and Reflectix (used a lot of spray adhesive for that) on every bit of metal, and some of the panels I used to cover the camper’s windows stuffed in there too (those were made of cardboard, Reflectix, and quilt insulation).

There’s paneling on the walls, the ceiling is made of paintable wallpaper spray adhesived to the foam board, so that doesn’t have really any extra insulative effect (and it was a pain to put up but turned out REALLY cute). There’s 1/2″ plywood on top of the foam insulation floor, then a friend gave me some leftover laminate flooring, then I put rugs on top of all of it because regular floor is TOO COLD in the winter. When I went to Ikea with a friend, he did not believe me that I expected to get a floor rug to cut up for $12 (but that’s just true!). I did not want permanent carpeting because I knew it would get trashed with snow and mud and boots, and I wanted to be able to pull it out and clean it, dry it, or replace it, easily.

Here you can see the closet full of jackets and Gore-tex pants, the rugs, the bins, and just barely my skis hanging above my bed.

Heat

I’ve mentioned before, and I’ll do it again, I was not trying to do an expensive buildout and made a lot of decisions with the mindset of, if I spend too much on the heater, I won’t actually be saving anything by not paying rent. You can pay A LOT for a heater. The forced air propane furnaces that are reviewed so well by vanlifers start around $745 (for a Propex, which are dope heaters, they don’t create moisture, but they do have to be externally vented which is a complicated job and a permanent change to the vehicle’s frame)

Alternative ways to spend $745:

  • Lou Harvey flew to 4 continents in two weeks and only spent $745 on airfare. Coincidence? I doubt it. That’s maybe not the best example of what you could buy for $745 but it’s an excellent point.
  • Almost 75 Pizza Hut dinner boxes, but only if you live near a Pizza Hut.
  • Rent in lots of places, two months rent if you have a roommate.
  • This donkey https://westslope.craigslist.org/grd/d/loma-paint-mini-donk/7188386466.html

I did a lot of research and read a lot of reviews, as usual, looking for a combination of most affordable and effective/safest. I settled on a catalytic heater, which are very efficient and very safe, as compared to the standard (and cheap) Mr. Buddy. The Camco Olympian was consistently well reviewed both on Amazon and by copious vanlife youtubers. I went with a Wave 3 because it was cheaper basically. It’s the smallest version, thus lowest output. It would be fine for the limited space, except that I was going to be up high all the time and altitude affects their functioning. I read a variety of complaints about altitude and decided to do it anyway, and the reality was, it doesn’t have as much output at altitude but it still works fine. It was a lot better in Ouray (7,900ft or so) than in Leadville (10,150) or the pass (11,018), but in all of those places it kept us warm, possibly (probably) thanks to all the insulation.

Not a great pic, you get the gist though. The heater is put away for the summer so I had to use this old one, it’s actually pre-laminated floor.

A lot of people worry about the carbon monoxide possibility, my understanding was that with a catalytic, it’s unlikely, but I can tell you all the time I ran it, the carbon monoxide detector never went off and I did test the detector once by putting it next to the Biolite so I know it worked. The moisture thing that people talk about also wasn’t a problem, there was more moisture buildup (frozen) on the windshield when I was running the heater than when I wasn’t, but it wasn’t significant and I never had any problems with dampness (I’m going to do another post with winter essentials that will cover the windshield probs). In fact, after a day’s work at the ice park or a day of backcountry skiing, Pip and I would both be soaked from the snow and running the heater dried everything up. I used approximately one propane tank/month in the coldest months, December and January.

The heater is mounted on wood that’s installed behind the passenger seat, I wanted it off the floor for better circulation. It’s connected to a propane tank that sits in the passenger seat foot well but is movable if I’ve got a passenger besides Pip (or what actually happened is, passengers sat side saddle with a Pip on their lap).

a surprise snowstorm caught me unaware and I didn’t get the cover on my bikes 😦

Other Winter Buildout Considerations

Roof Vent: I did not want to do this, after all the problems I had with the camper’s roof in the winter. Snow is EXTREMELY PERVASIVE, I was constantly re-waterproofing the roof of the camper and no matter what I did to the screw holes that held the solar panels on, I could never get them not to leak during snow melt. The van’s panel is held on by the roof racks, the ONLY structural change I made to the body of the van was the two holes that the panel’s wiring runs through to the controller inside. This was a calculated risk, and I take a lot of care removing snow around there and there’s piles of caulk and waterproofing around it.

Water: I also chose not to do a sink or pump and only have portable water storage. I don’t heat the van when Pippa and I are not in it, so there’s too many times water can freeze. I used gallons and Nalgenes and Hydroflasks, and got water at the coffee shop, the gym, the hot springs, the public bathroom, or the grocery store. If a gallon freezes, you can melt it out pretty quickly either in front of the heater or on the dashboard in the sun.

Organization: I have two pairs of skis (an AT setup for backcountry and skate skis, I actually sold my Nordic classics because three seemed to be TOO MANY in the van. Nordic skis are very light and good for hanging, so they hang over my bed. The AT skis, being so heavy, go under the bed behind my gear/clothes/boots bins. Unfortunately, I bought a ski box from some guy for cheap and it didn’t occur to me that it might not be long enough for either pair of skis (d’oh!). Ski and climbing boots (and crampons) go in a big Rubbermaid bin underneath the bed during winter, while they’re in use, and in the roof boxes in the summer.

I badly wanted a closet because my various jackets (down puffy, down midlayer, soft shell, hard shell, etc) and pants (insulated hard shell, work bibs) wouldn’t sit in a box very well and I thought they’d store better hanging (they do, and the other upside is when they’re wet, I can put them away and they’ll dry there). My axes hang on a hook, then are secured by a velcro strap that I screwed into the side of the closet. Gloves of all kinds pretty much always live on the dashboard. You can definitely pick out a winter vanlifer by all the many things drying on their dashboard.

Okay, that’s enough for now. I’ll do another post with Winter Vanlife Essentials for like, windshield stuff, bedding, miscellaneous comfort things, etc.